You bought a domain on Cloudflare and hosting on Hostinger. Now, you need to connect them. Most people change Nameservers, which takes 24 hours. We will use the A Record method. It is instant (5 minutes) and keeps your site secure.
1: Hostinger WordPress Setup
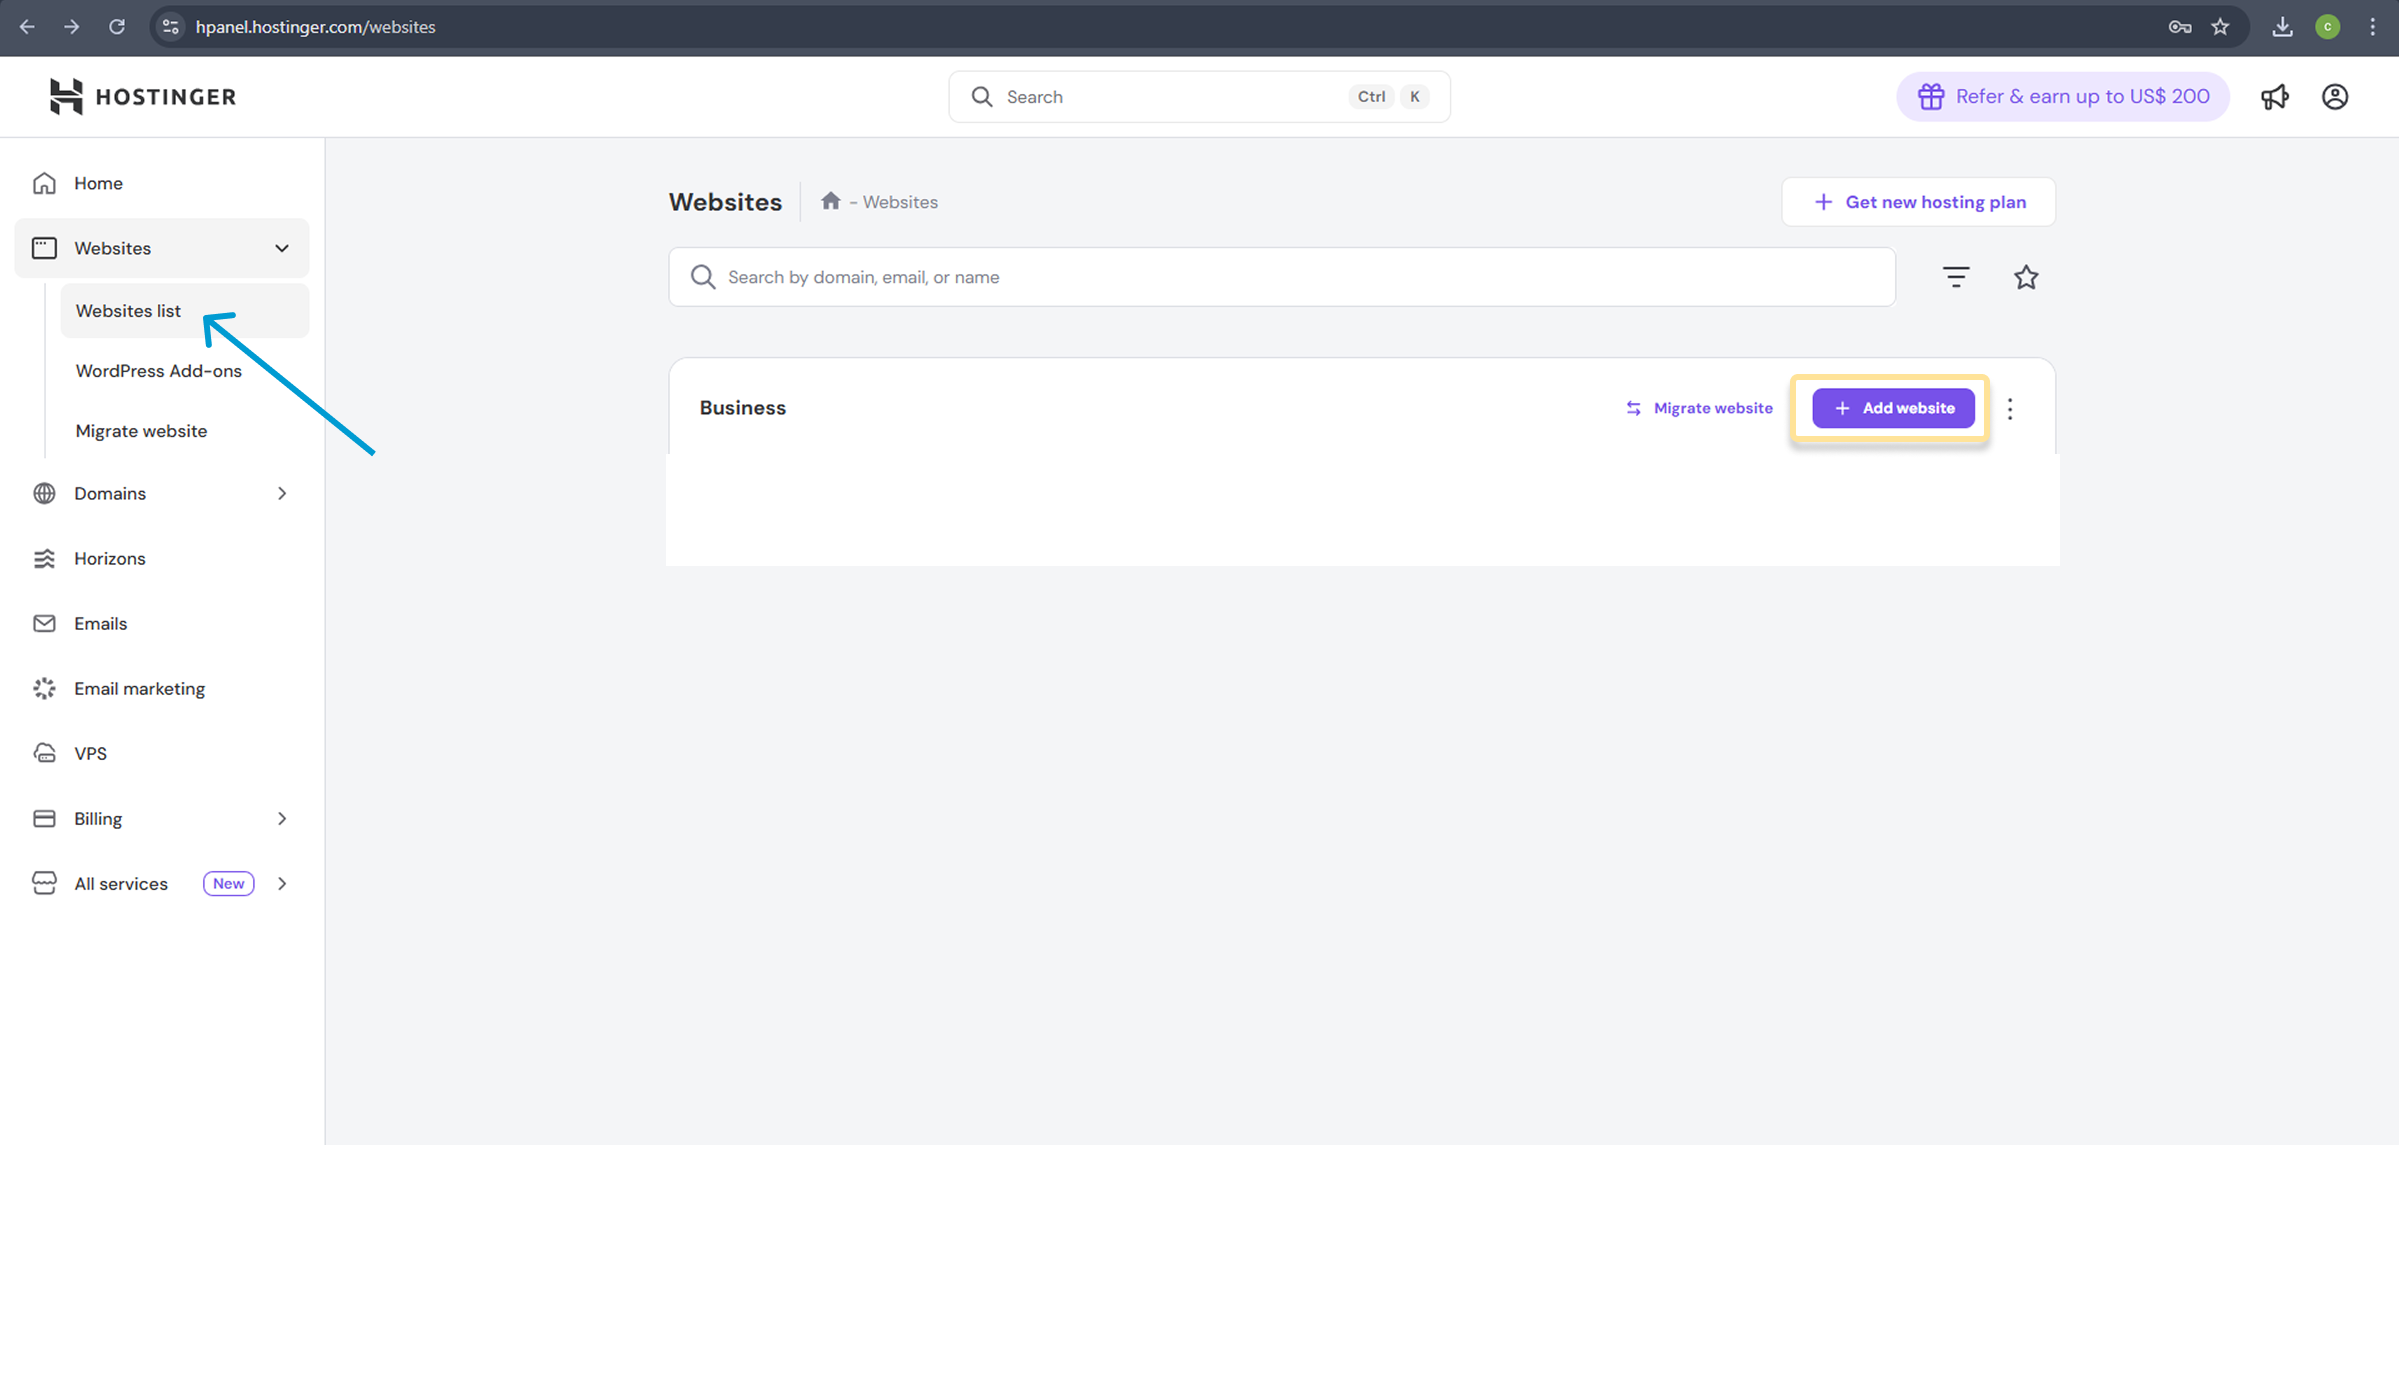
Step 1: Start the Setup Log in to your Hostinger Panel. Click on “Setup” or “Create New Website”. Select “WordPress” as your platform.
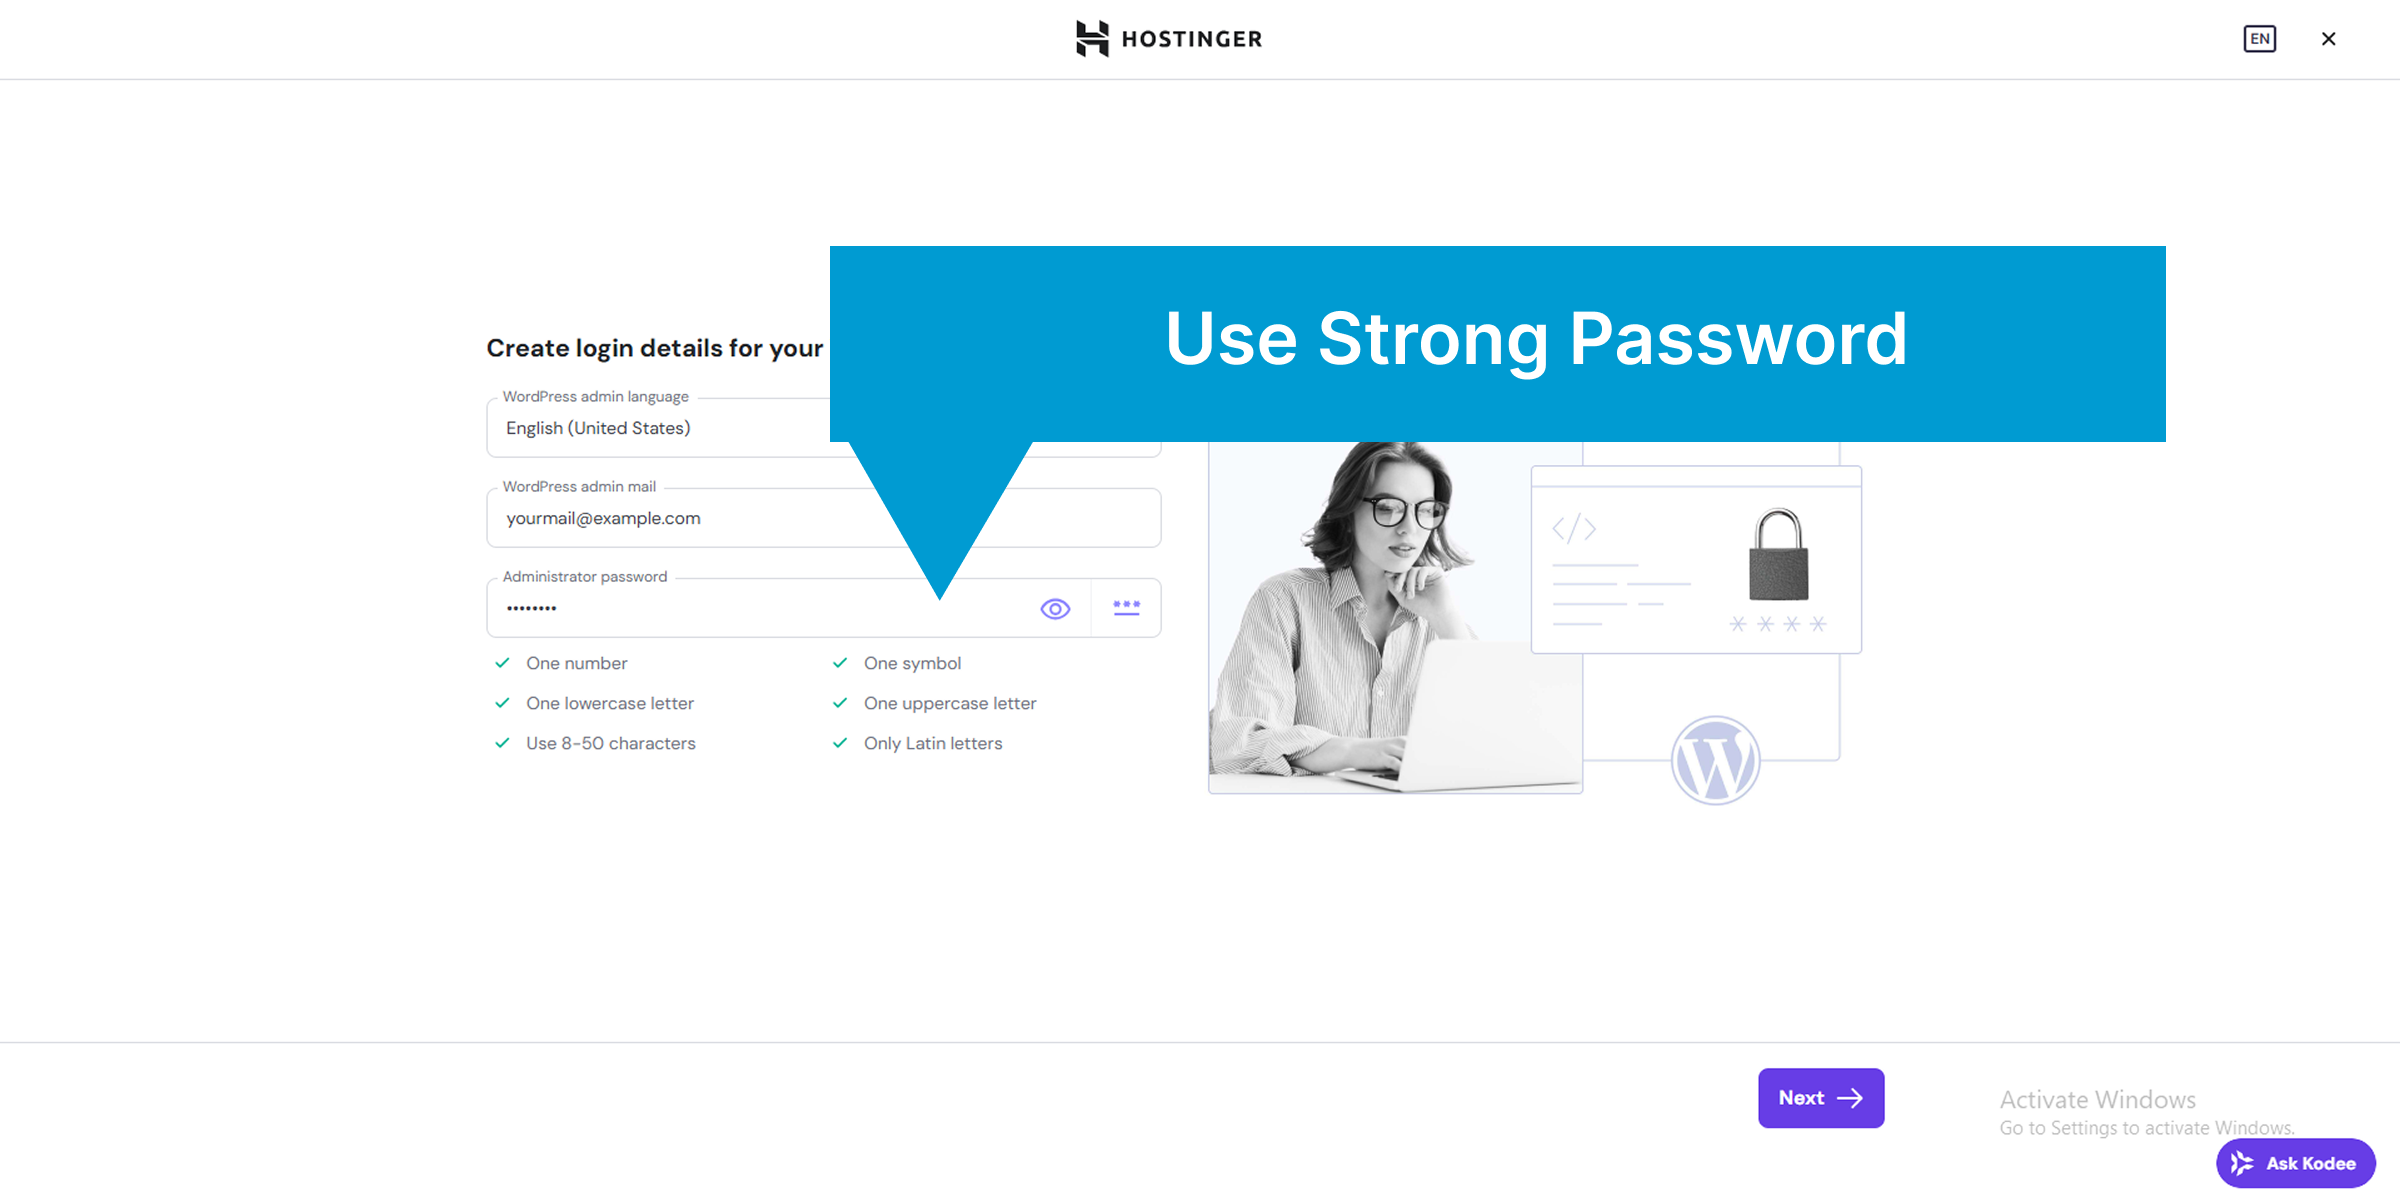
Step 2: Create Login Details Enter your Administrator email and create a Strong Password. Click Continue. (Note: You will use this password to log in to your website later).
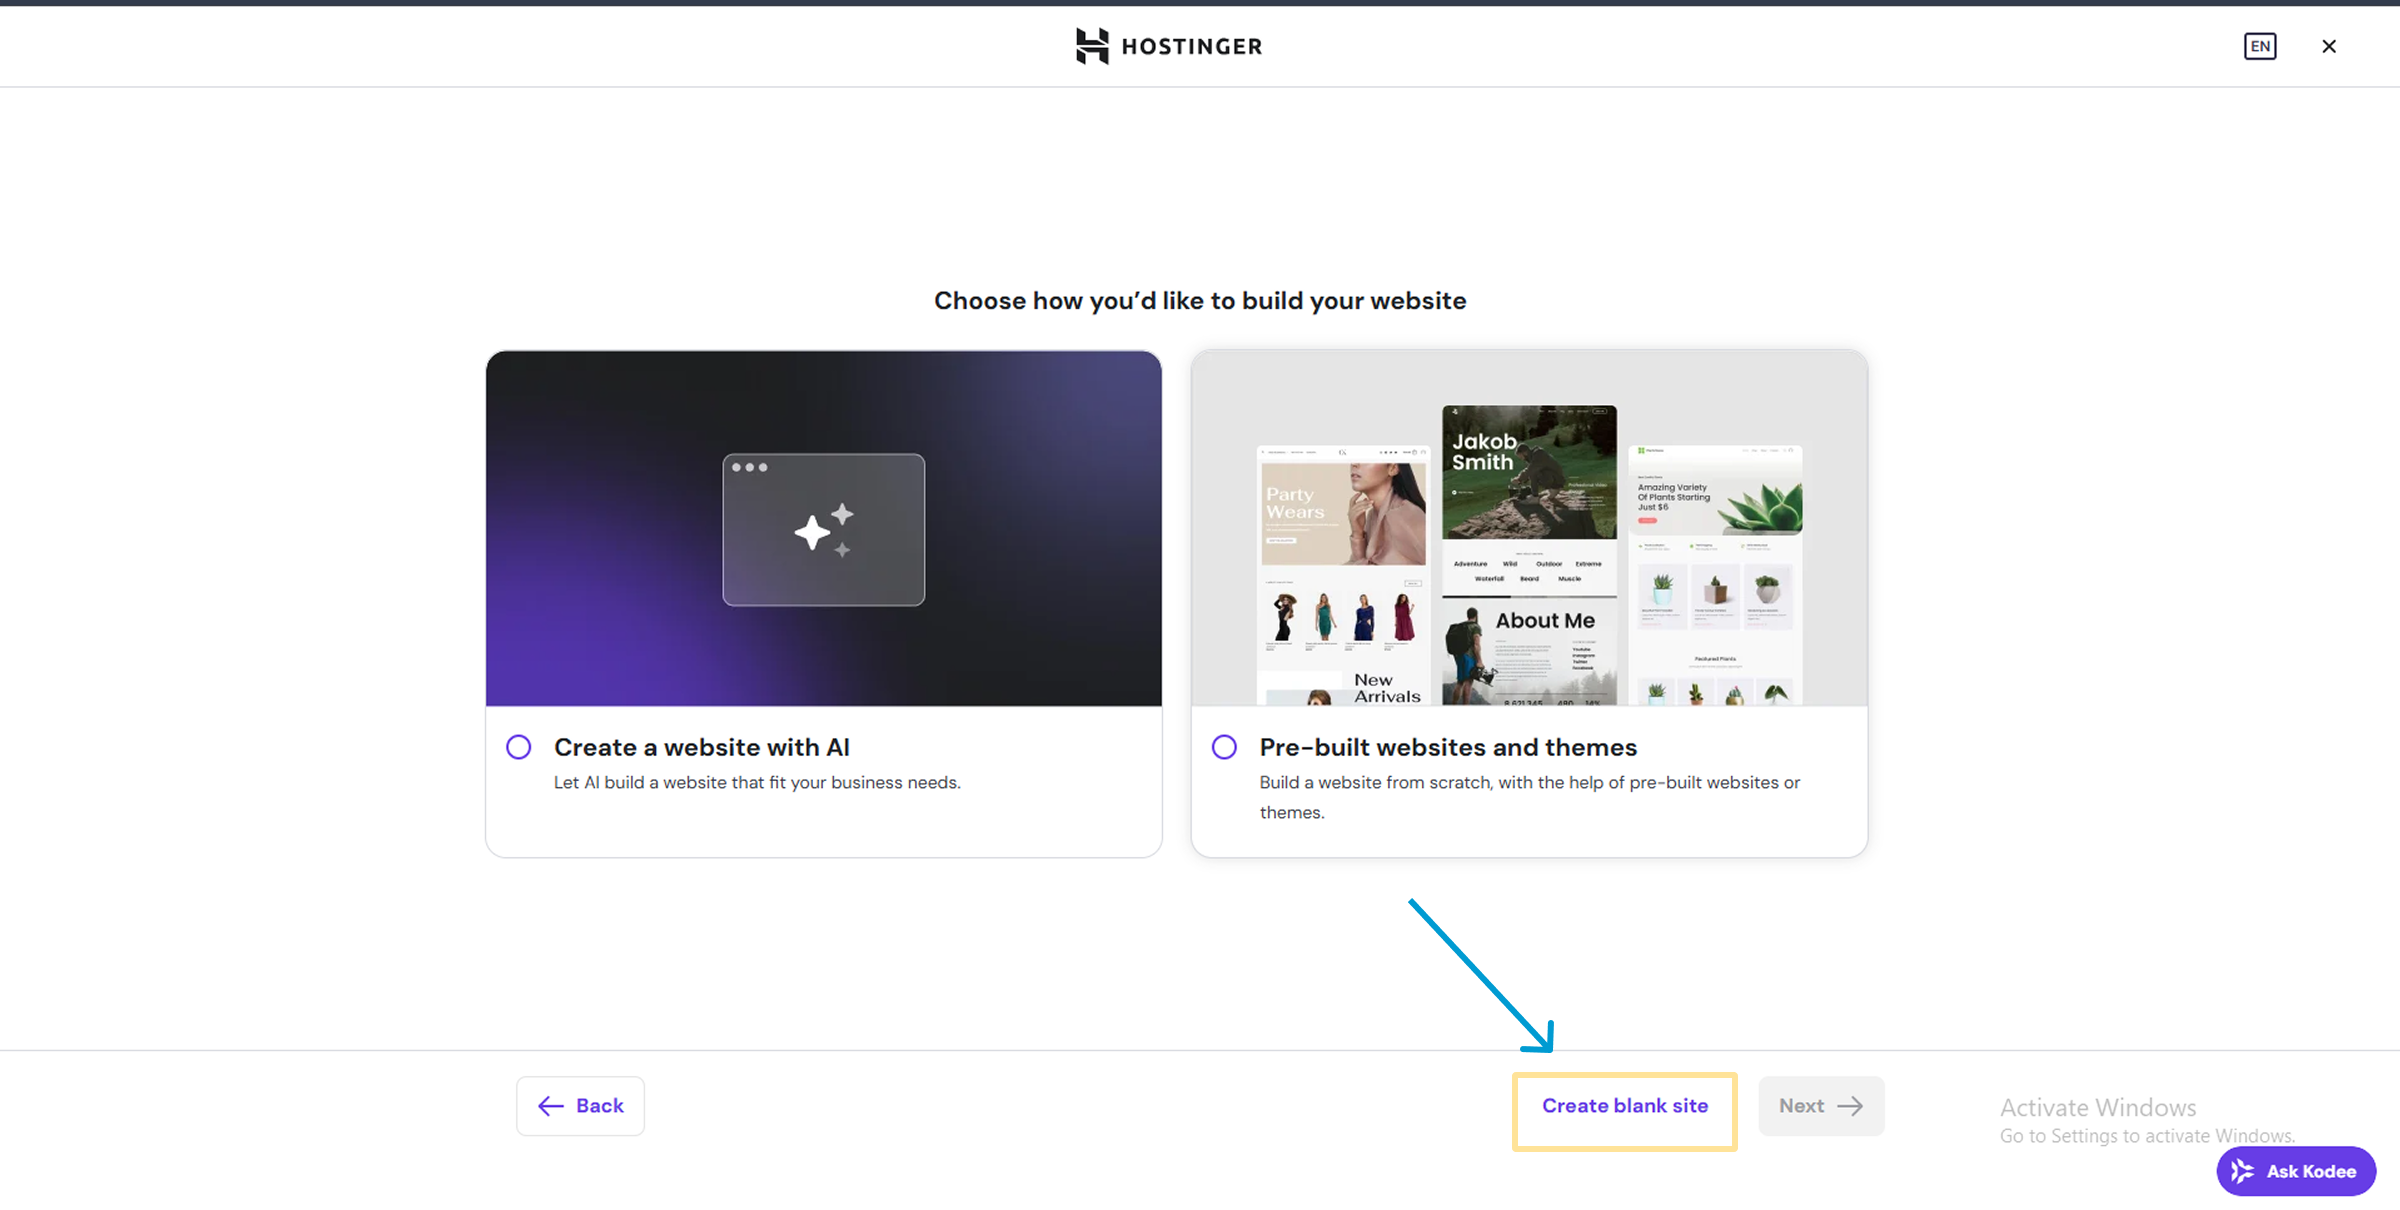
Step 3: Skip Templates Hostinger will ask you to choose a template. Scroll down and select “Skip, I will start from scratch”. We want a clean, blank site.
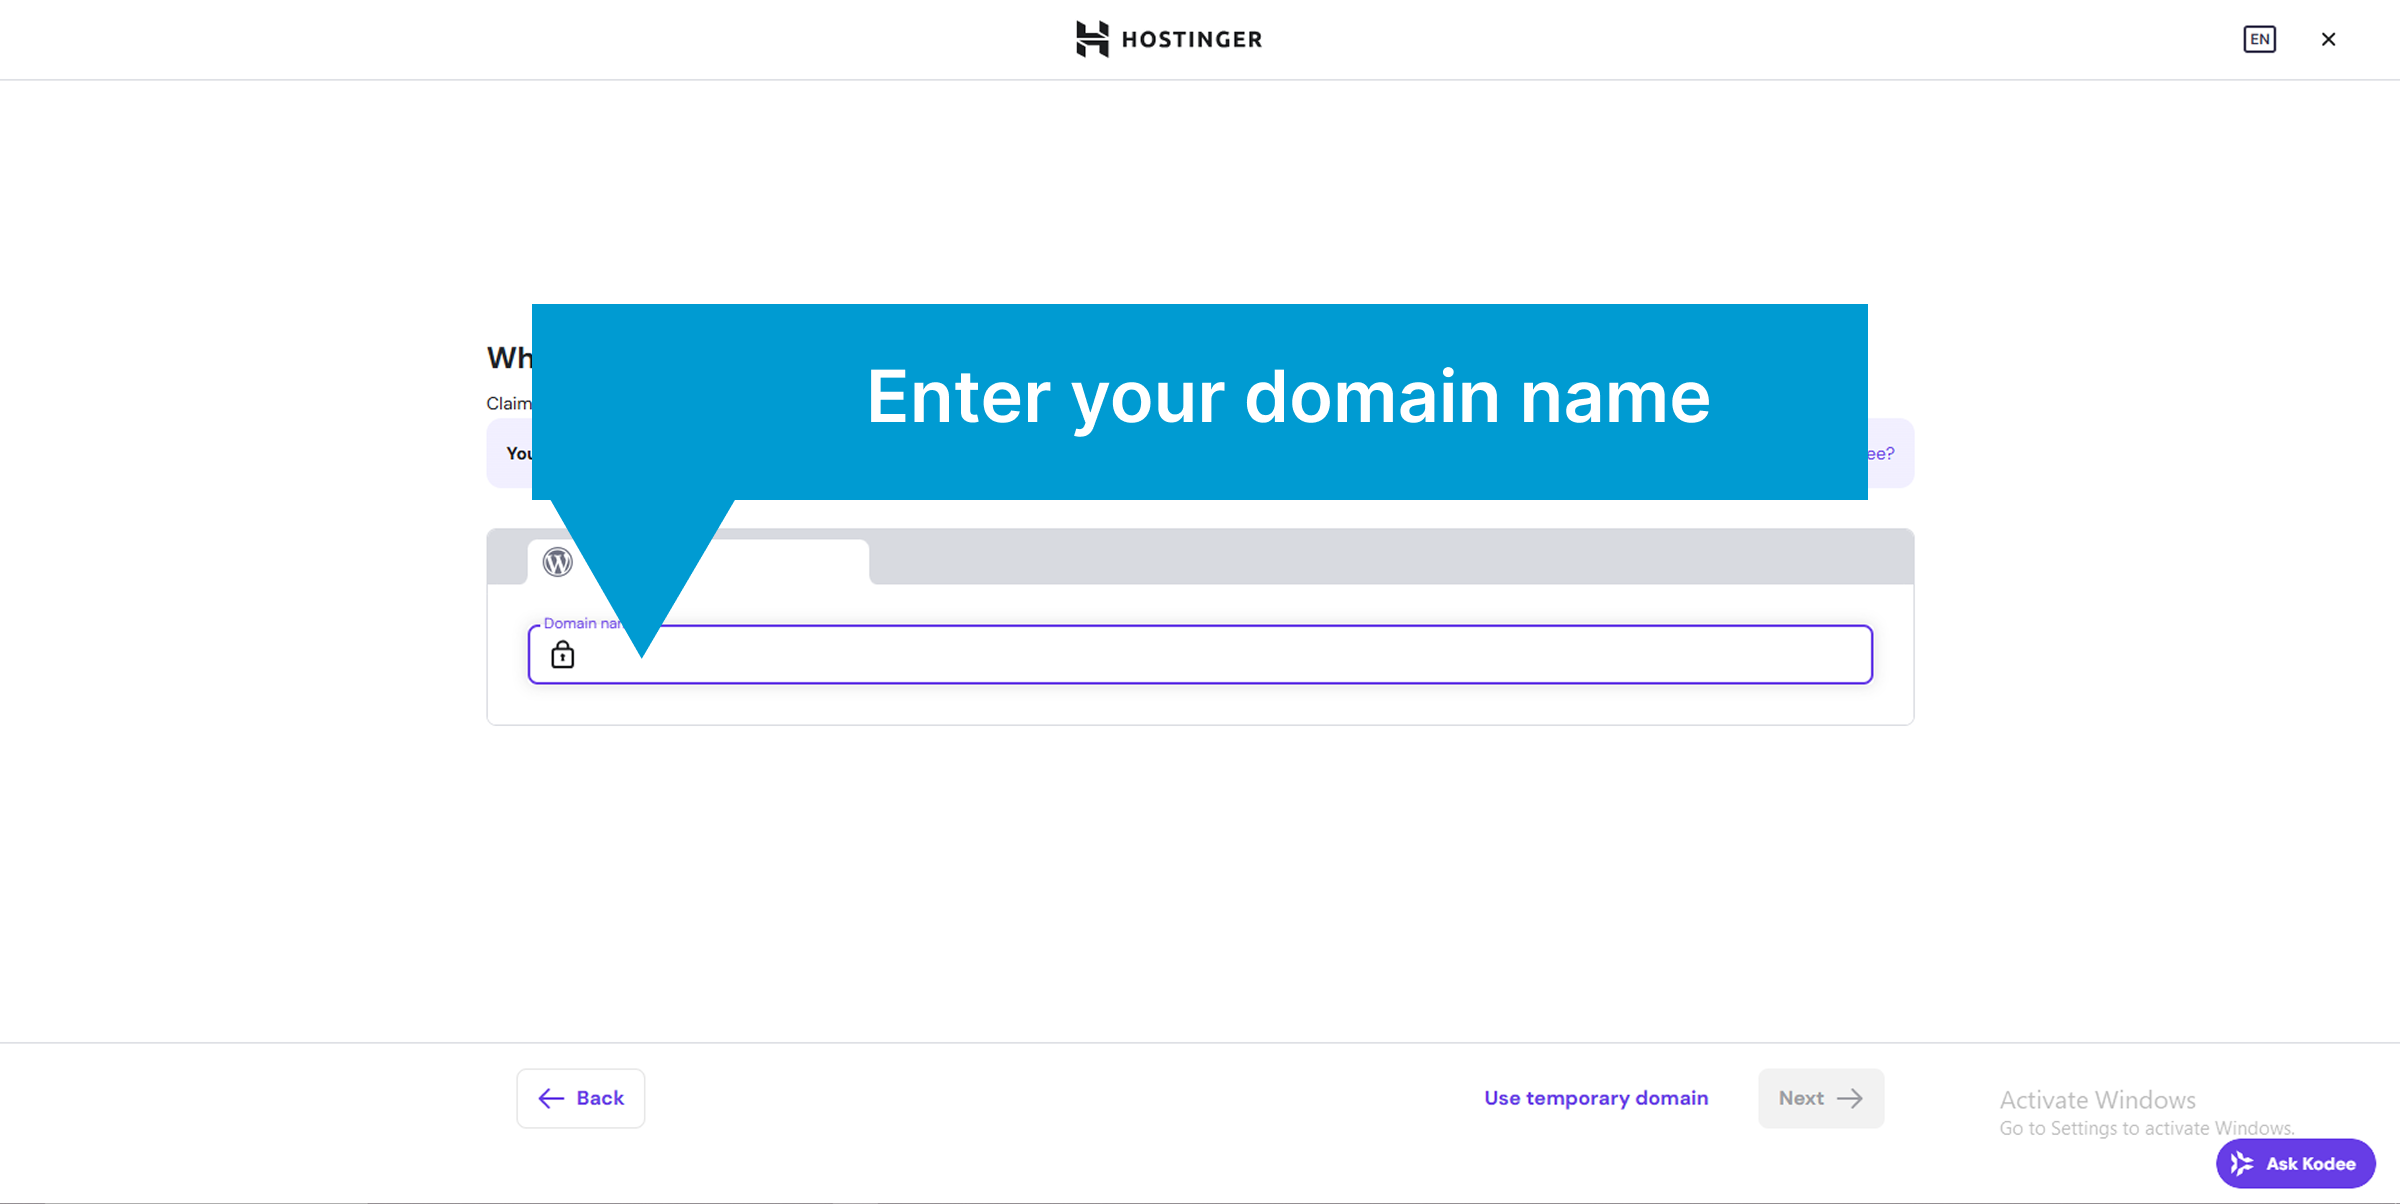
Step 4: Select Your Domain Enter the domain name you bought from Cloudflare (e.g., yoursite.com). Click Select. Choose your server location (closest to your audience) and finish the setup.
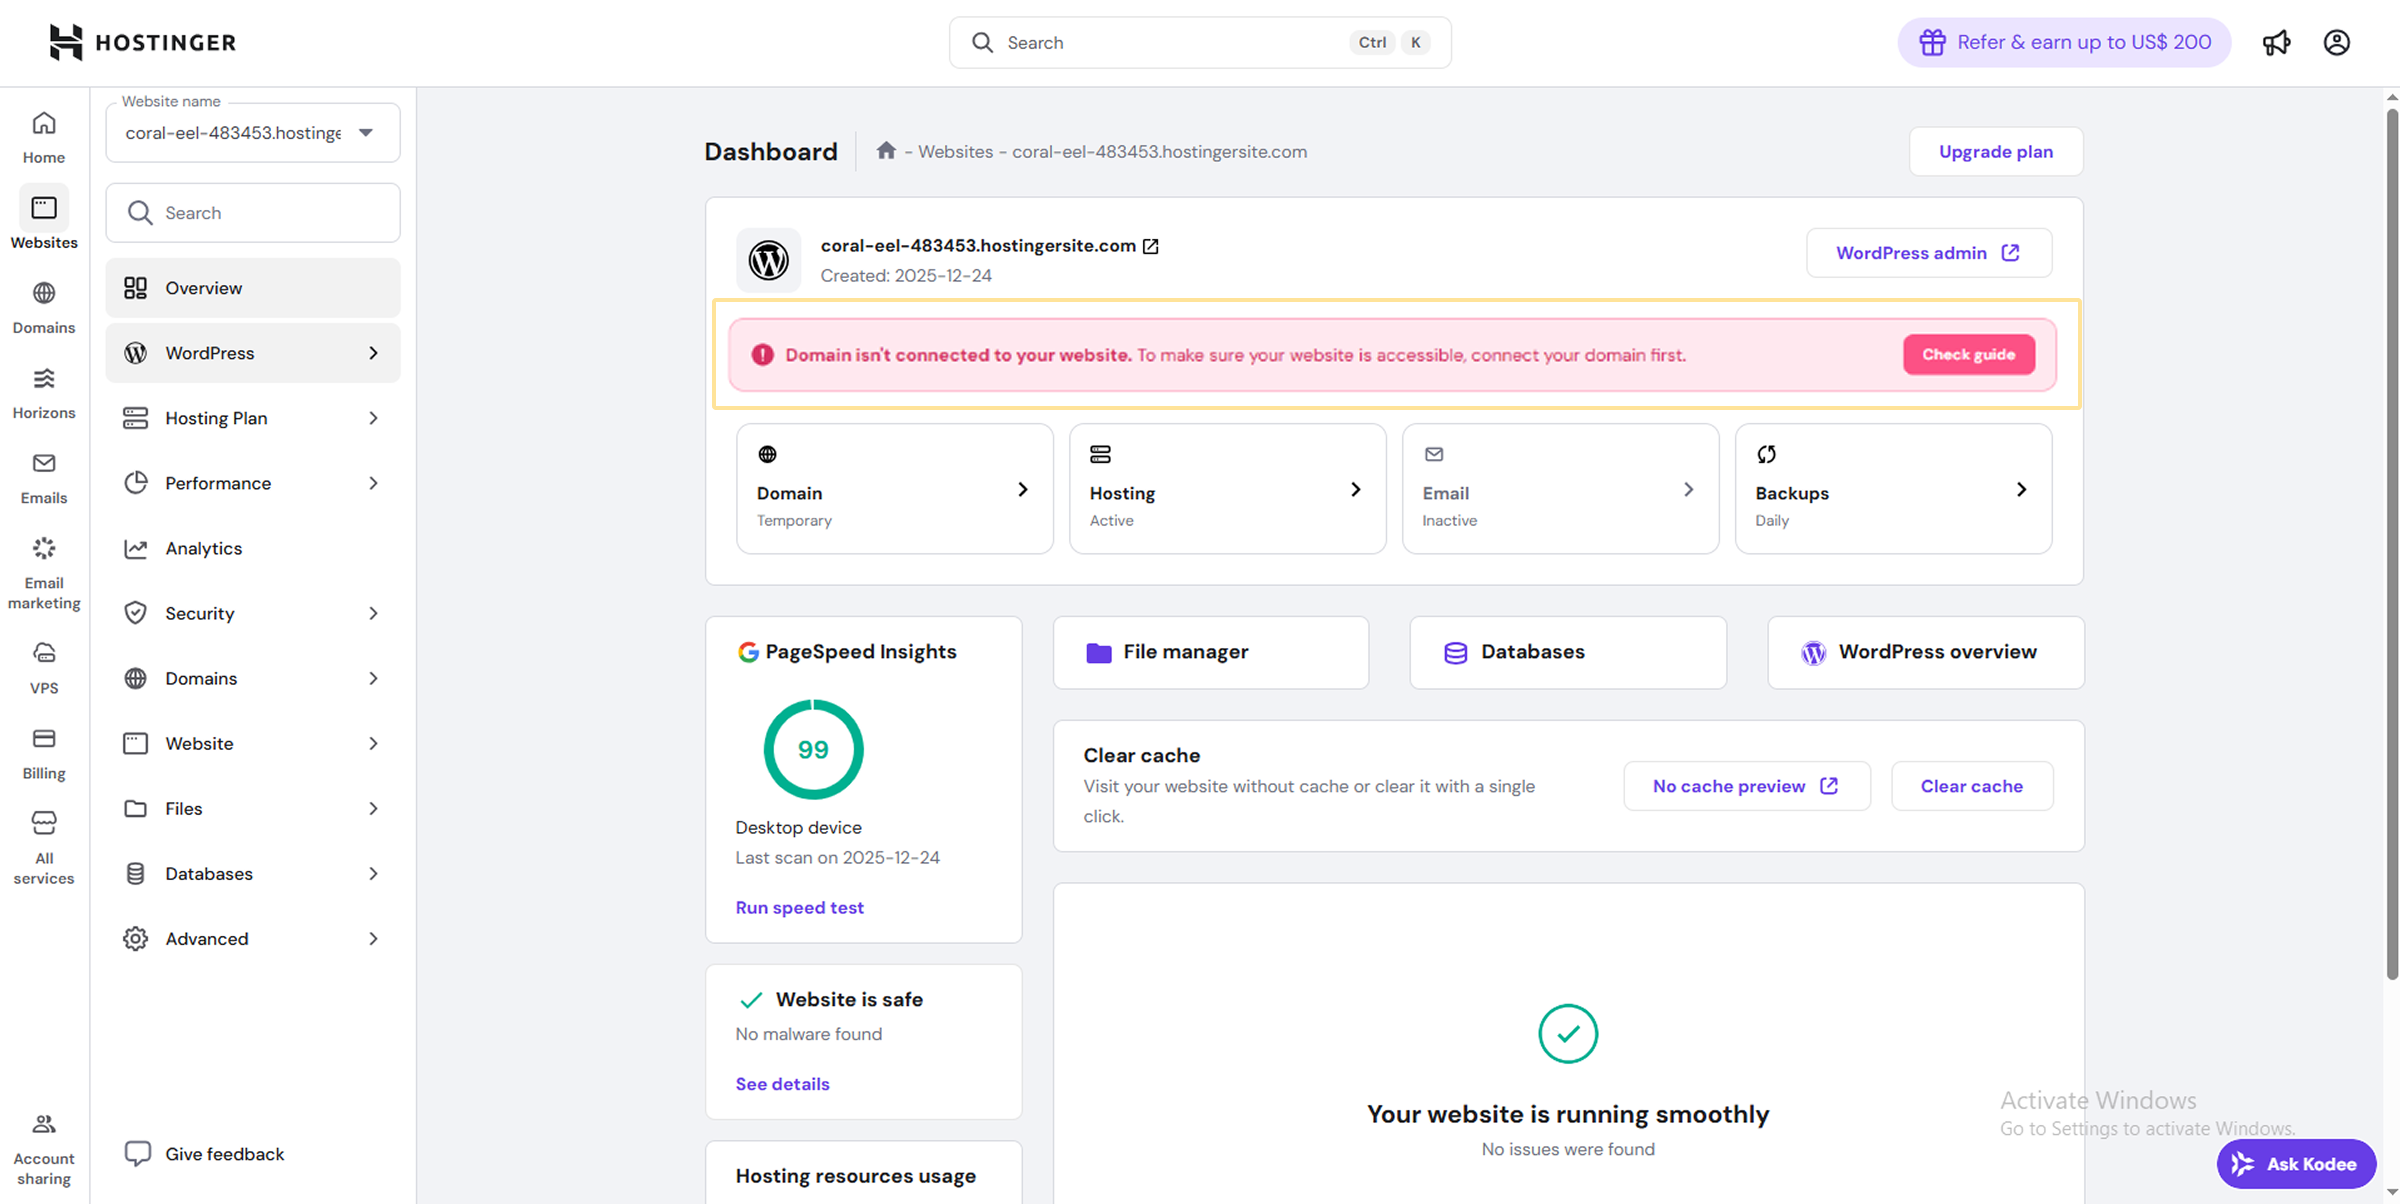
Step 5: The “Temporary Link” Issue After installation, go to your Dashboard. You might see a “Temporary Domain” or a warning saying “Domain not connected”. This happens because Cloudflare is not pointing to Hostinger yet. Let’s fix this.
Part 2: Connect via Cloudflare (The Fix)
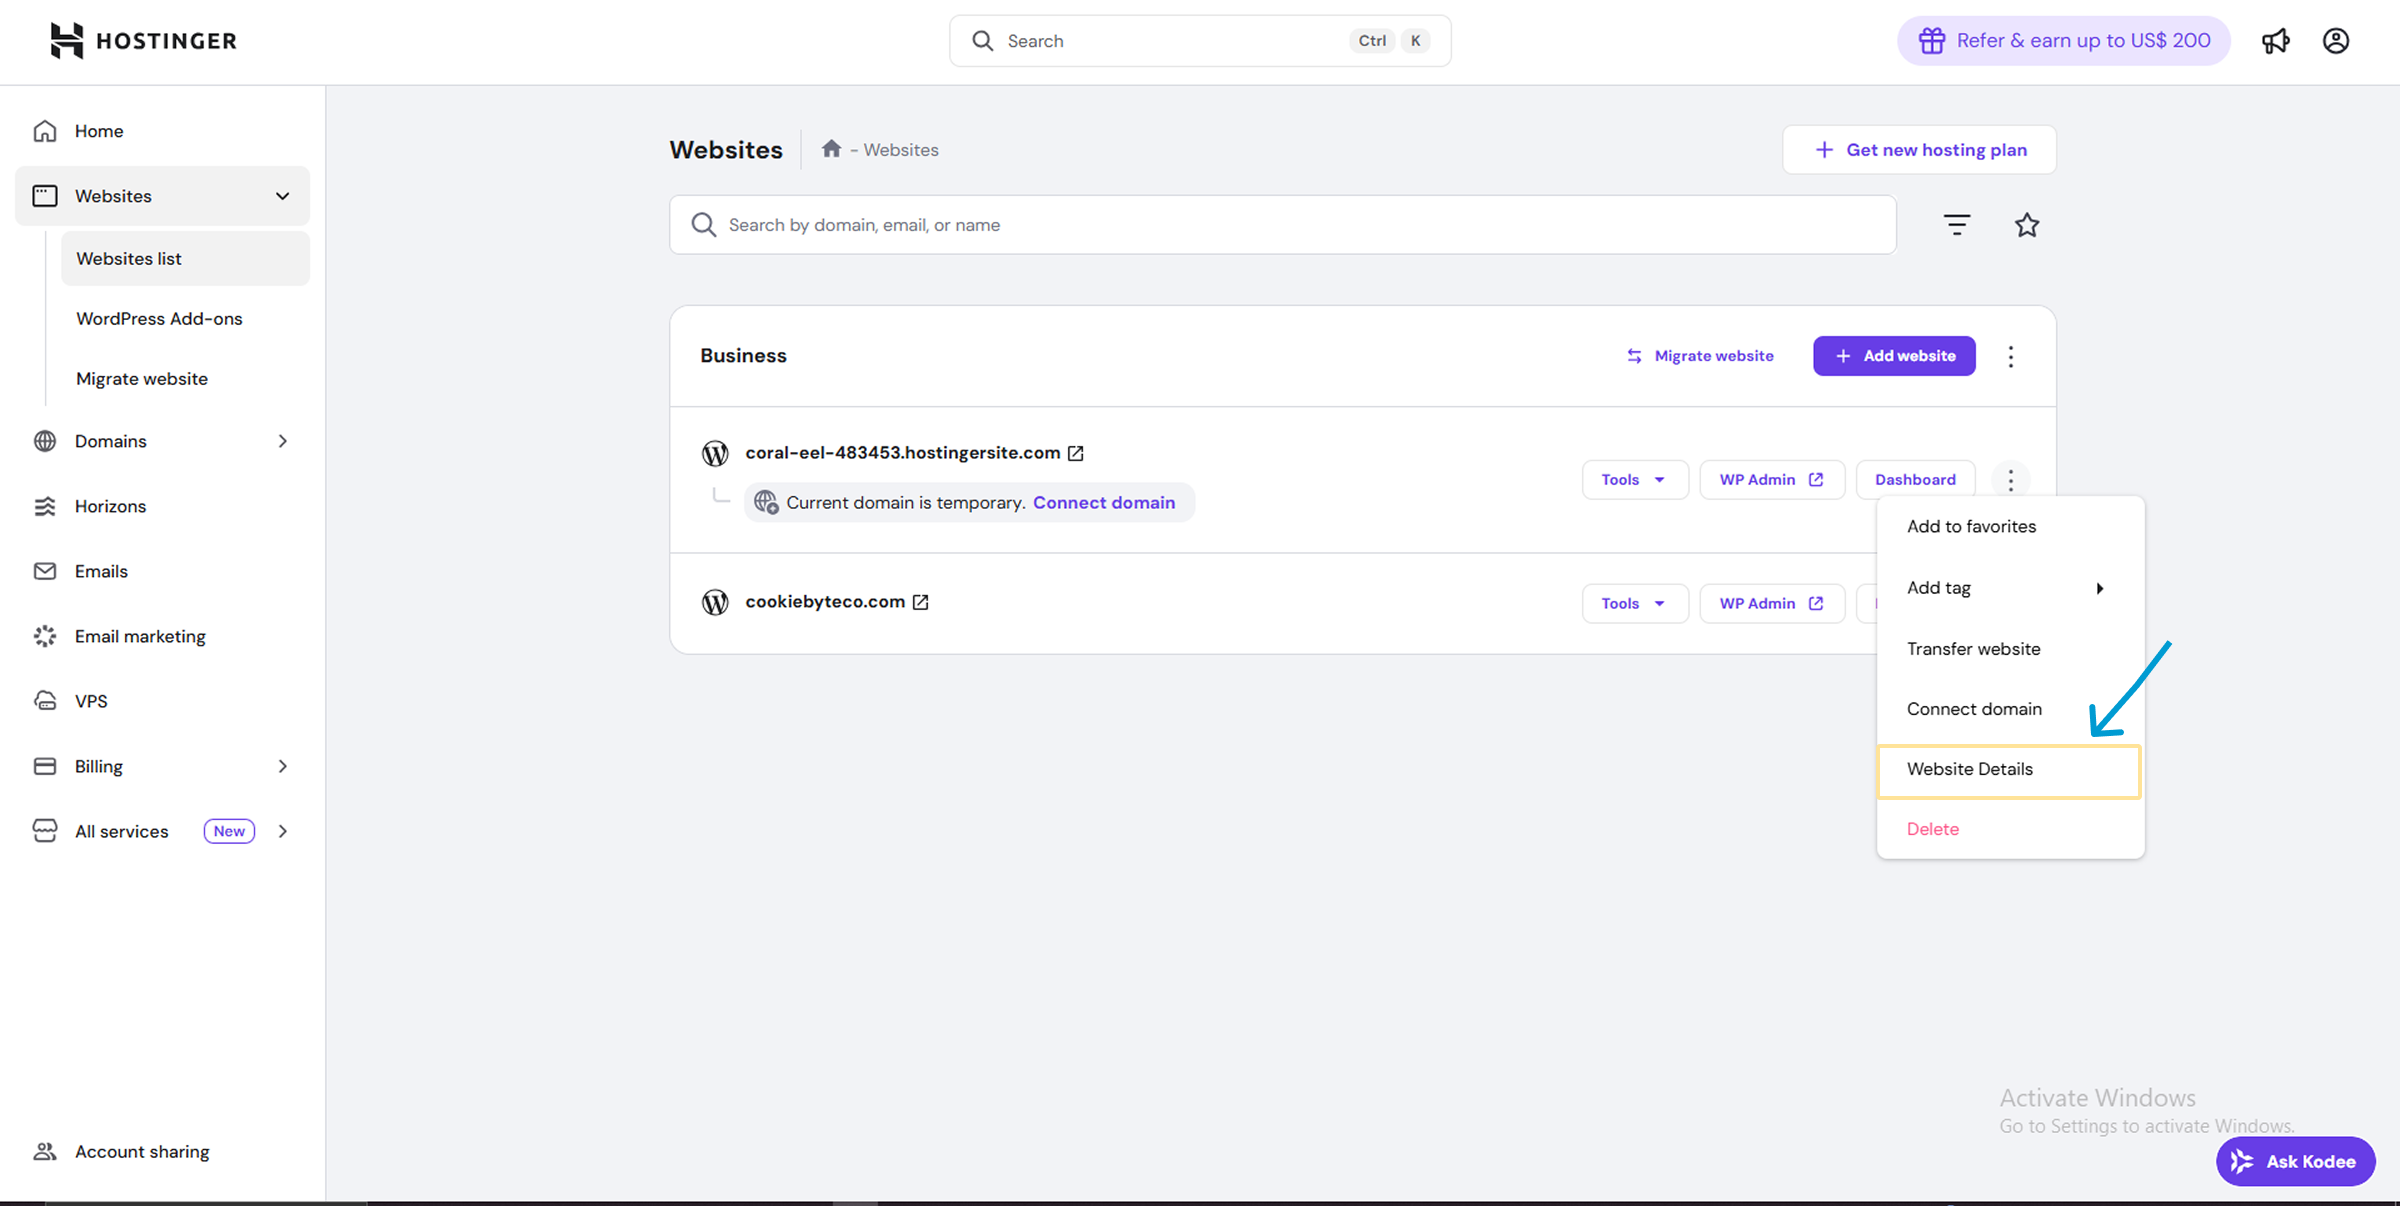
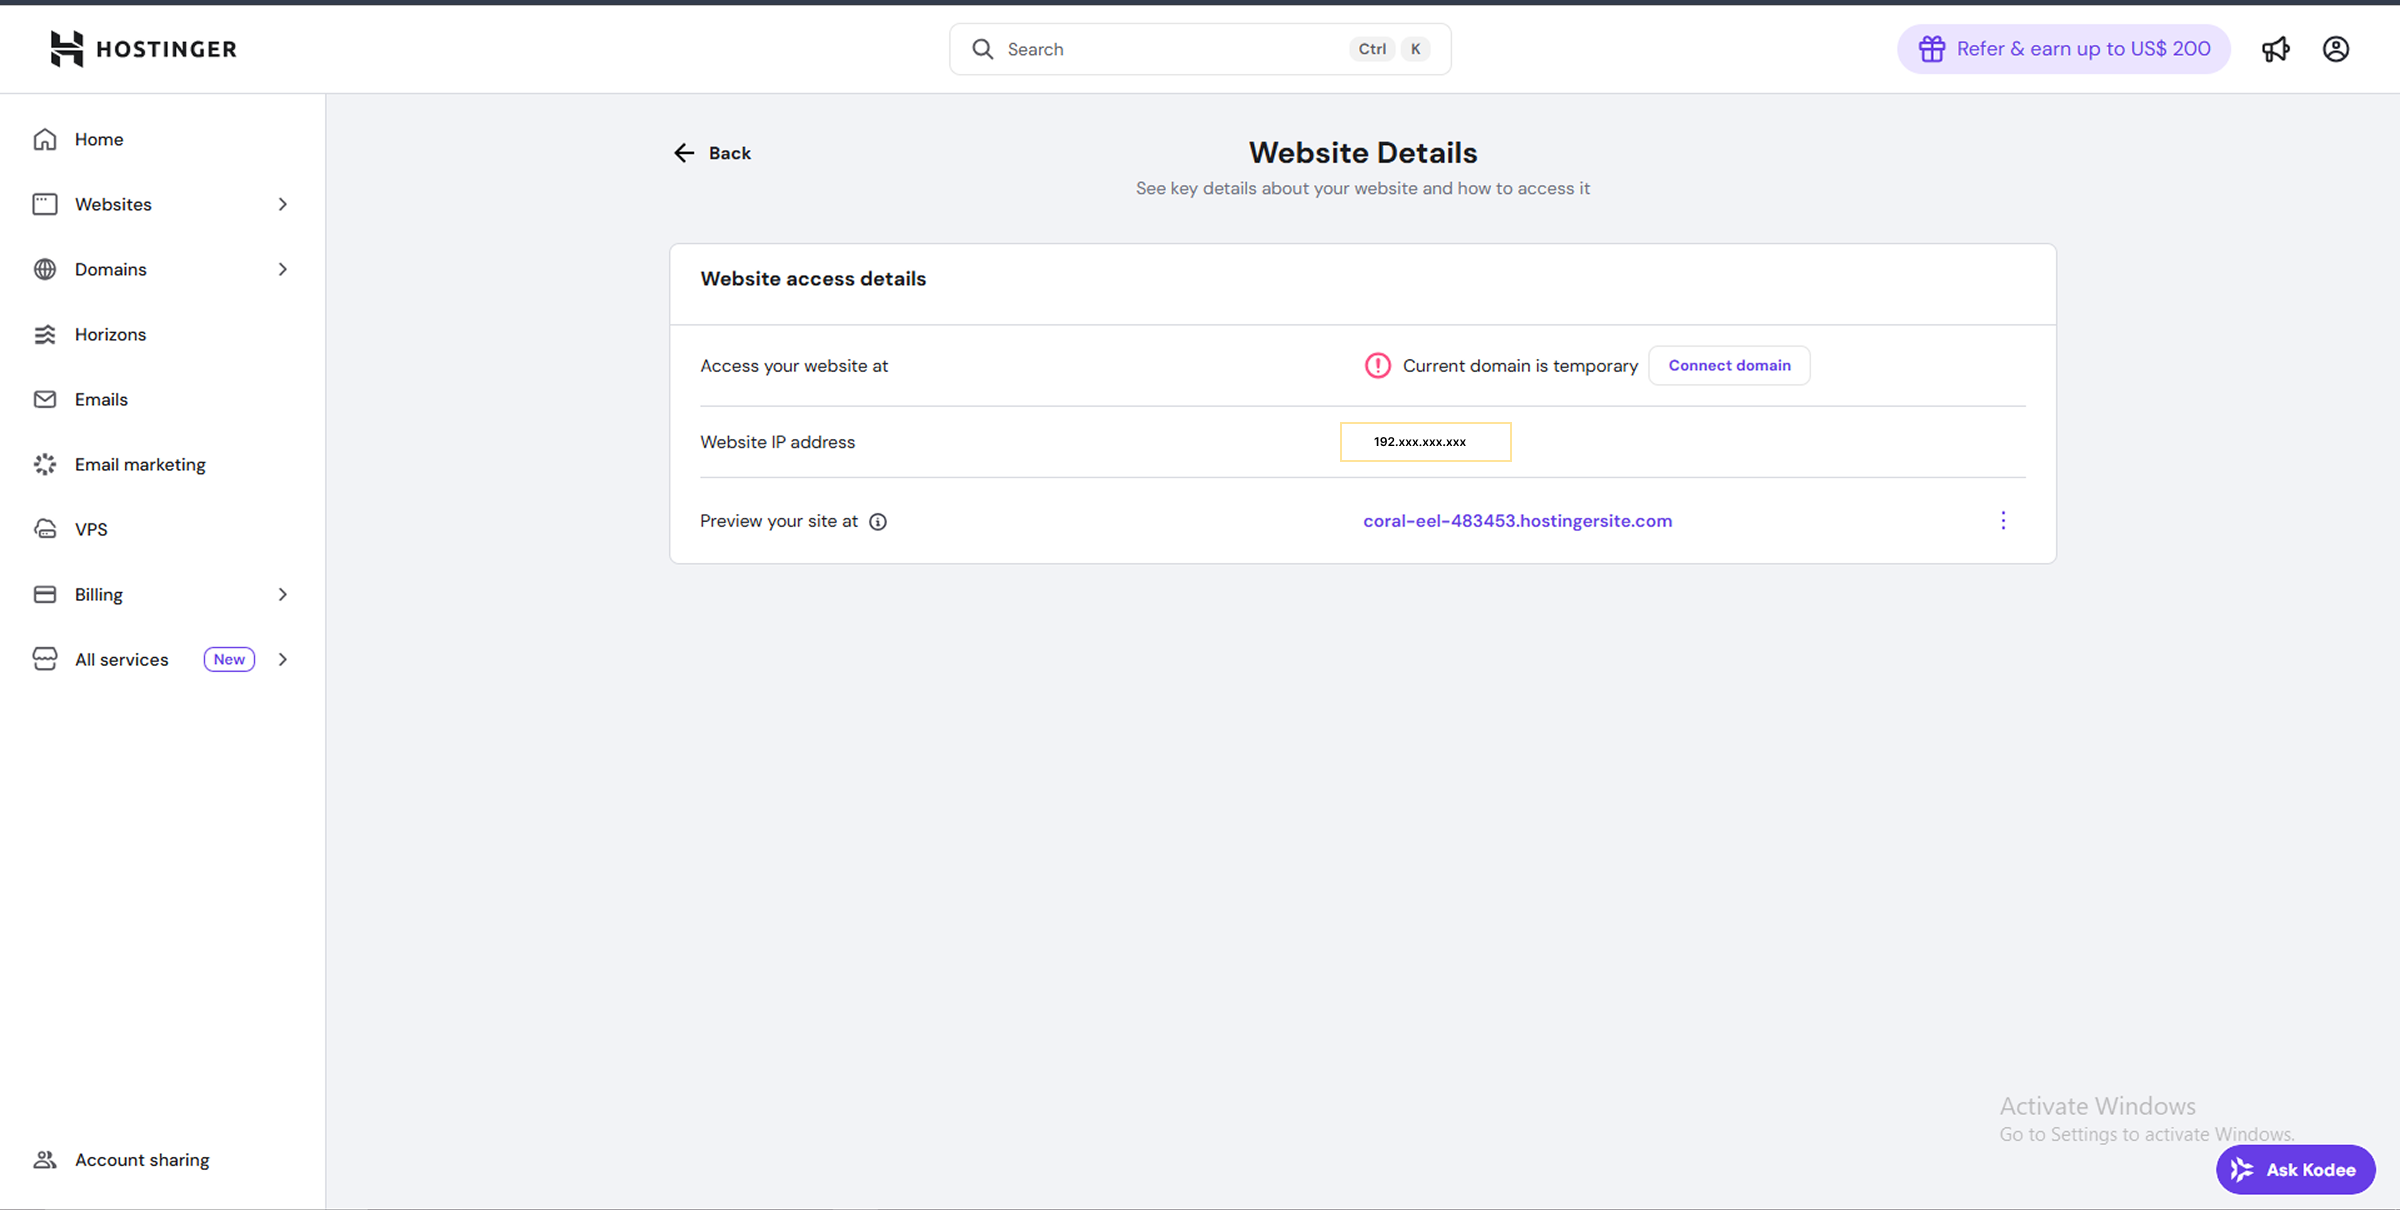
Step 6: Get Hostinger IP Address On your Hostinger Dashboard sidebar, find “Website Details” (or Server Details).
Copy the “Website IP Address”. (It looks like numbers: 145.10.xx.xx).
Copy the “Website IP Address”. (It looks like numbers: 145.10.xx.xx).
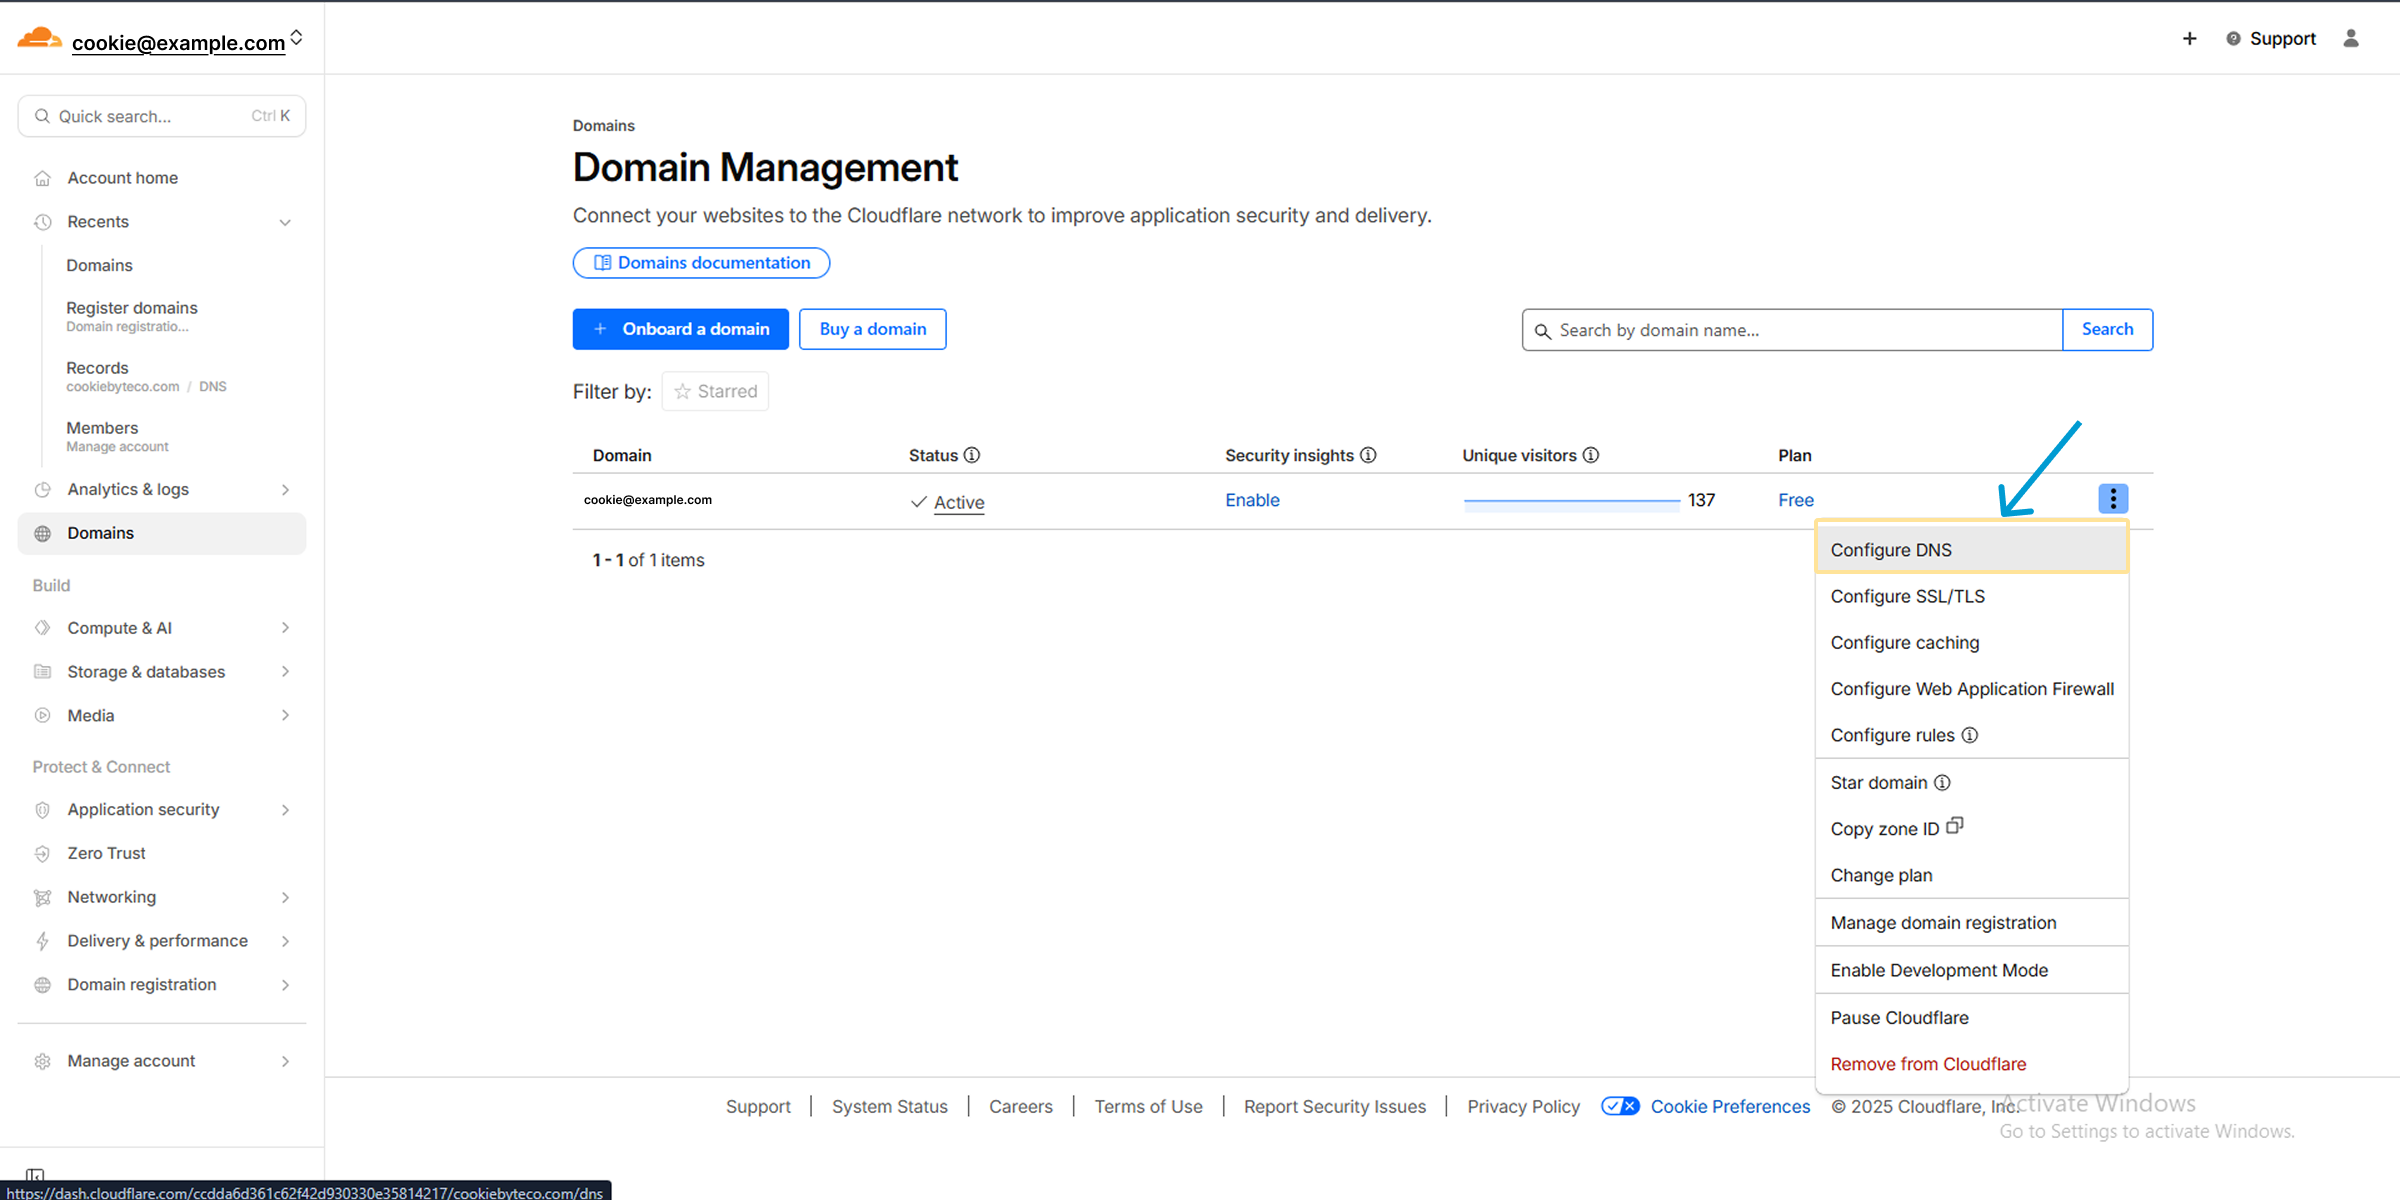
Step 7: Go to Cloudflare DNS Log in to your Cloudflare account. Select your domain. Go to DNS > Records from the left menu.
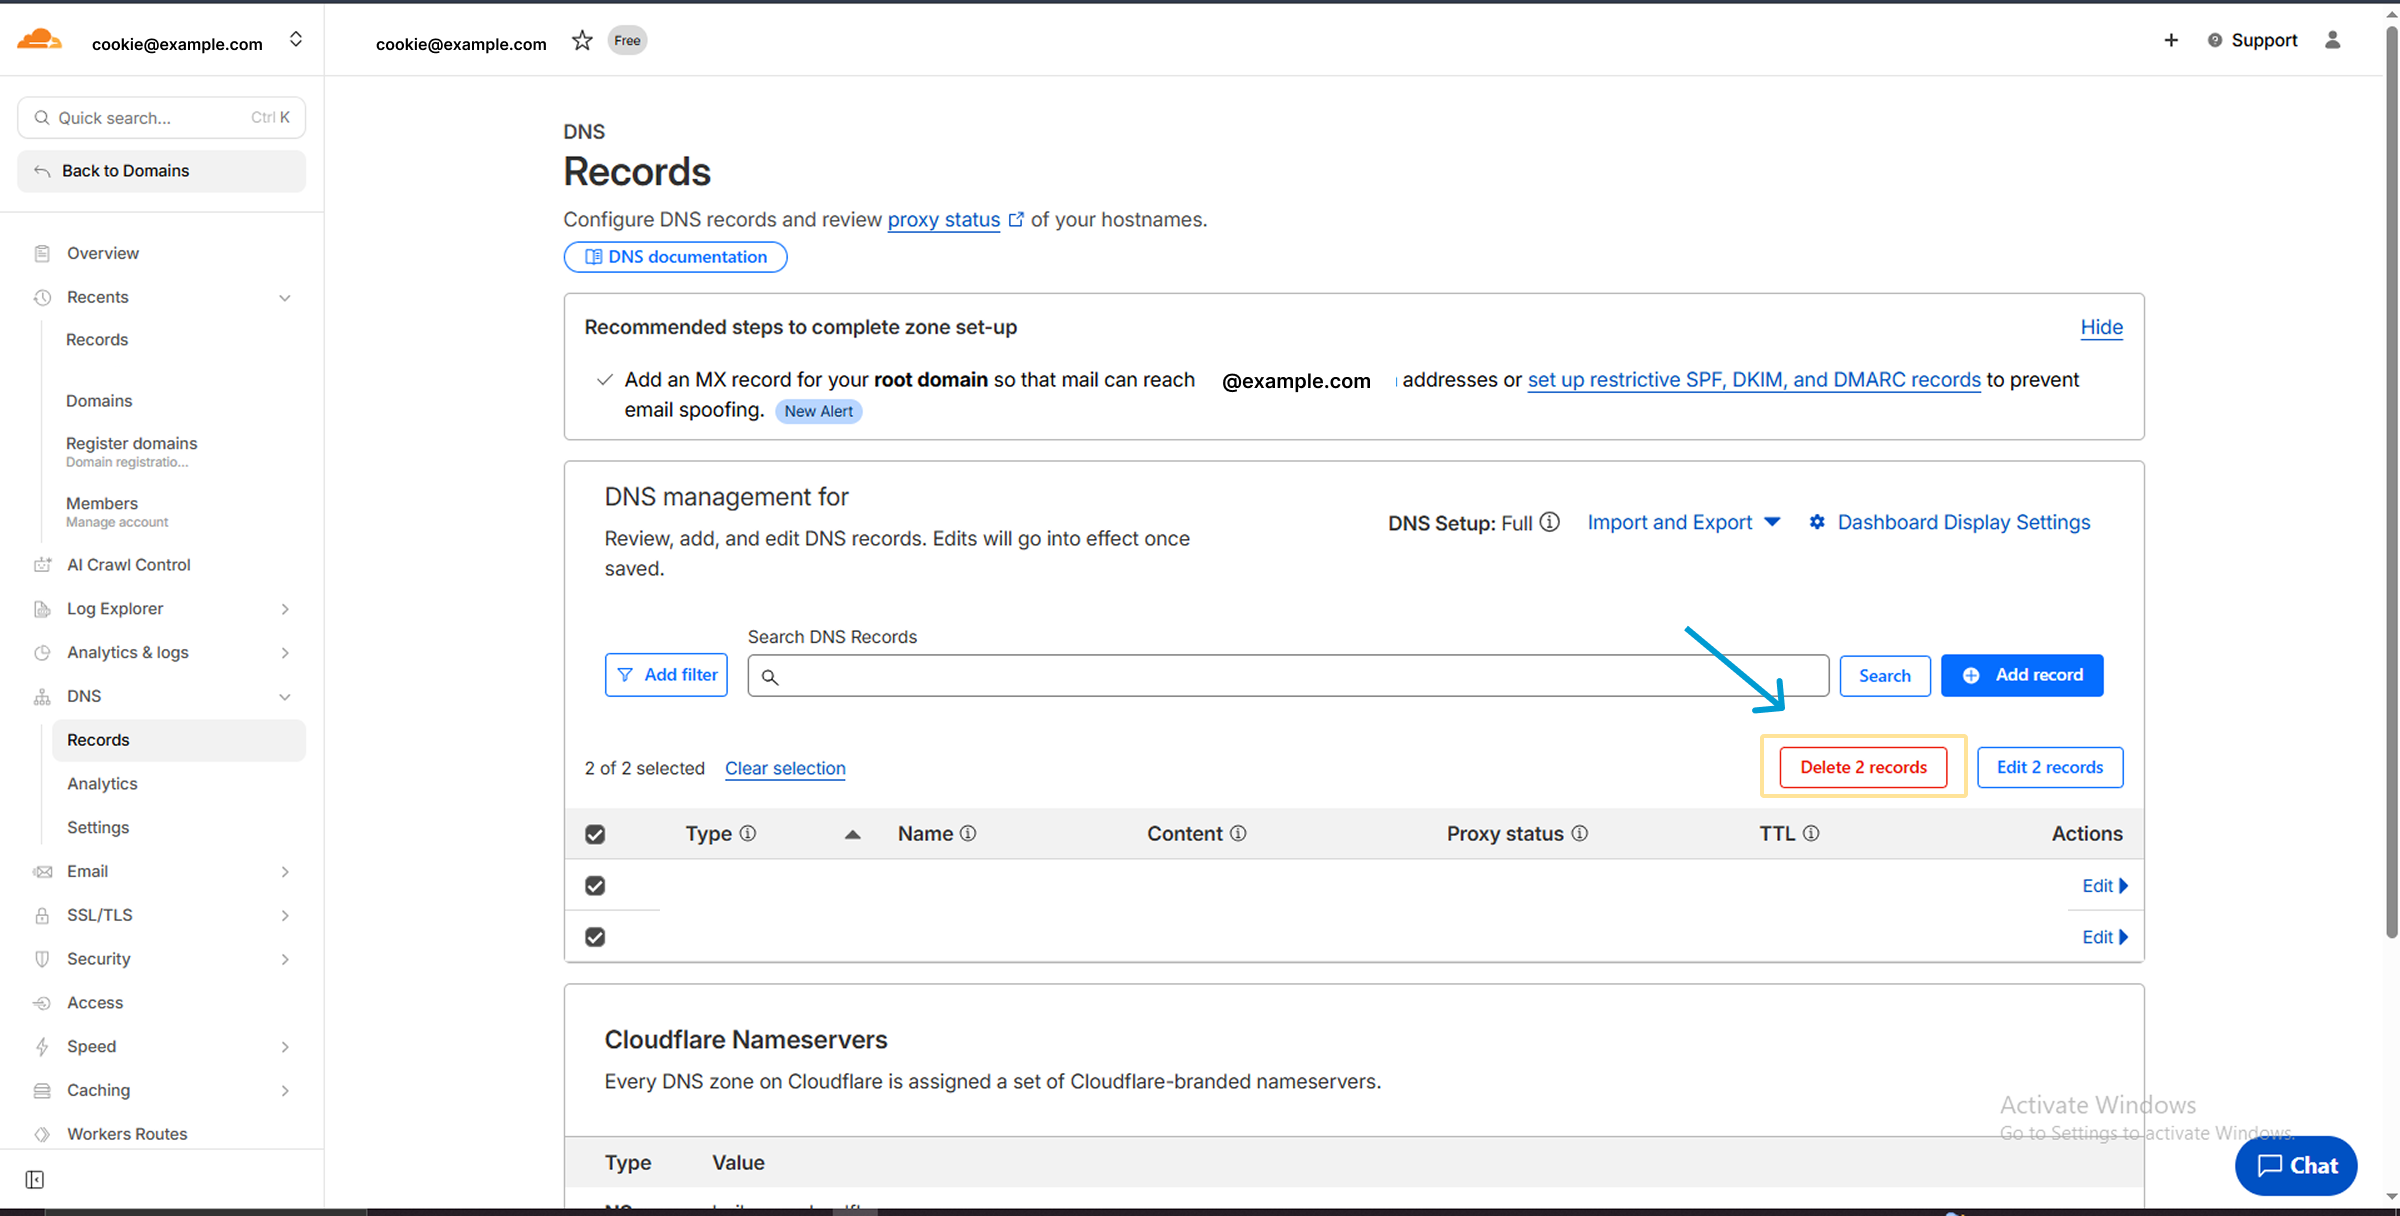
Step 8: Clean Old Records Check if there are any existing A Records or CNAME Records pointing to old IPs. Delete them to avoid conflicts.
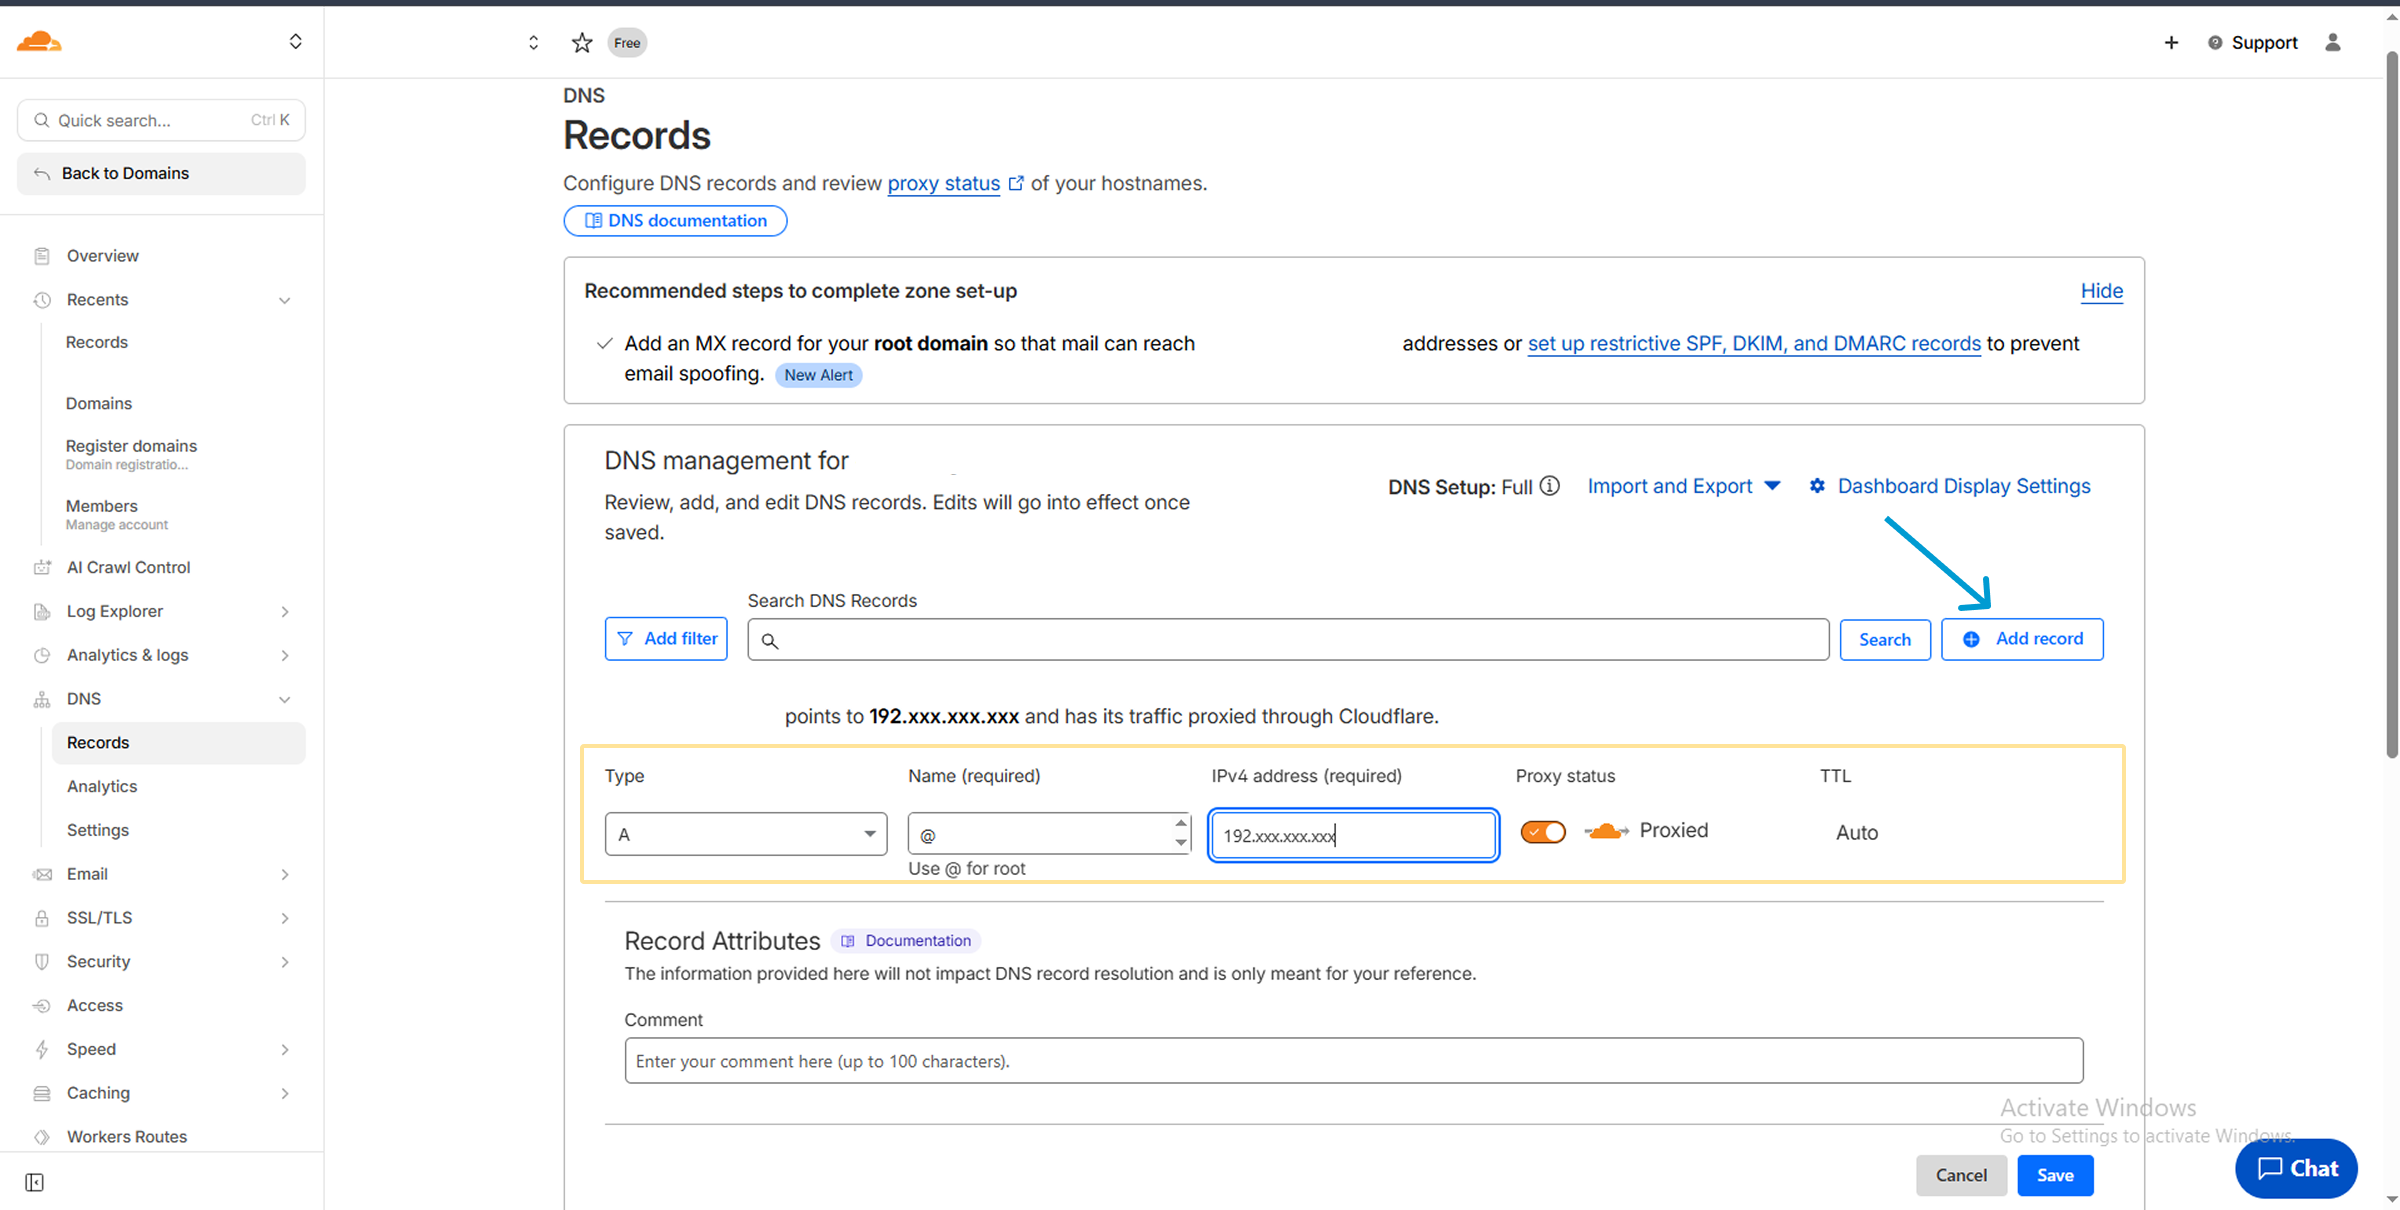
Step 9: Add the A Record (The Connection) Click the blue “Add Record” button.
-
Type: A
-
Name: @ (This means root domain)
-
IPv4 Address: Paste the Hostinger IP you copied.
-
Proxy Status: On (Orange Cloud).
-
Action: Click Save.
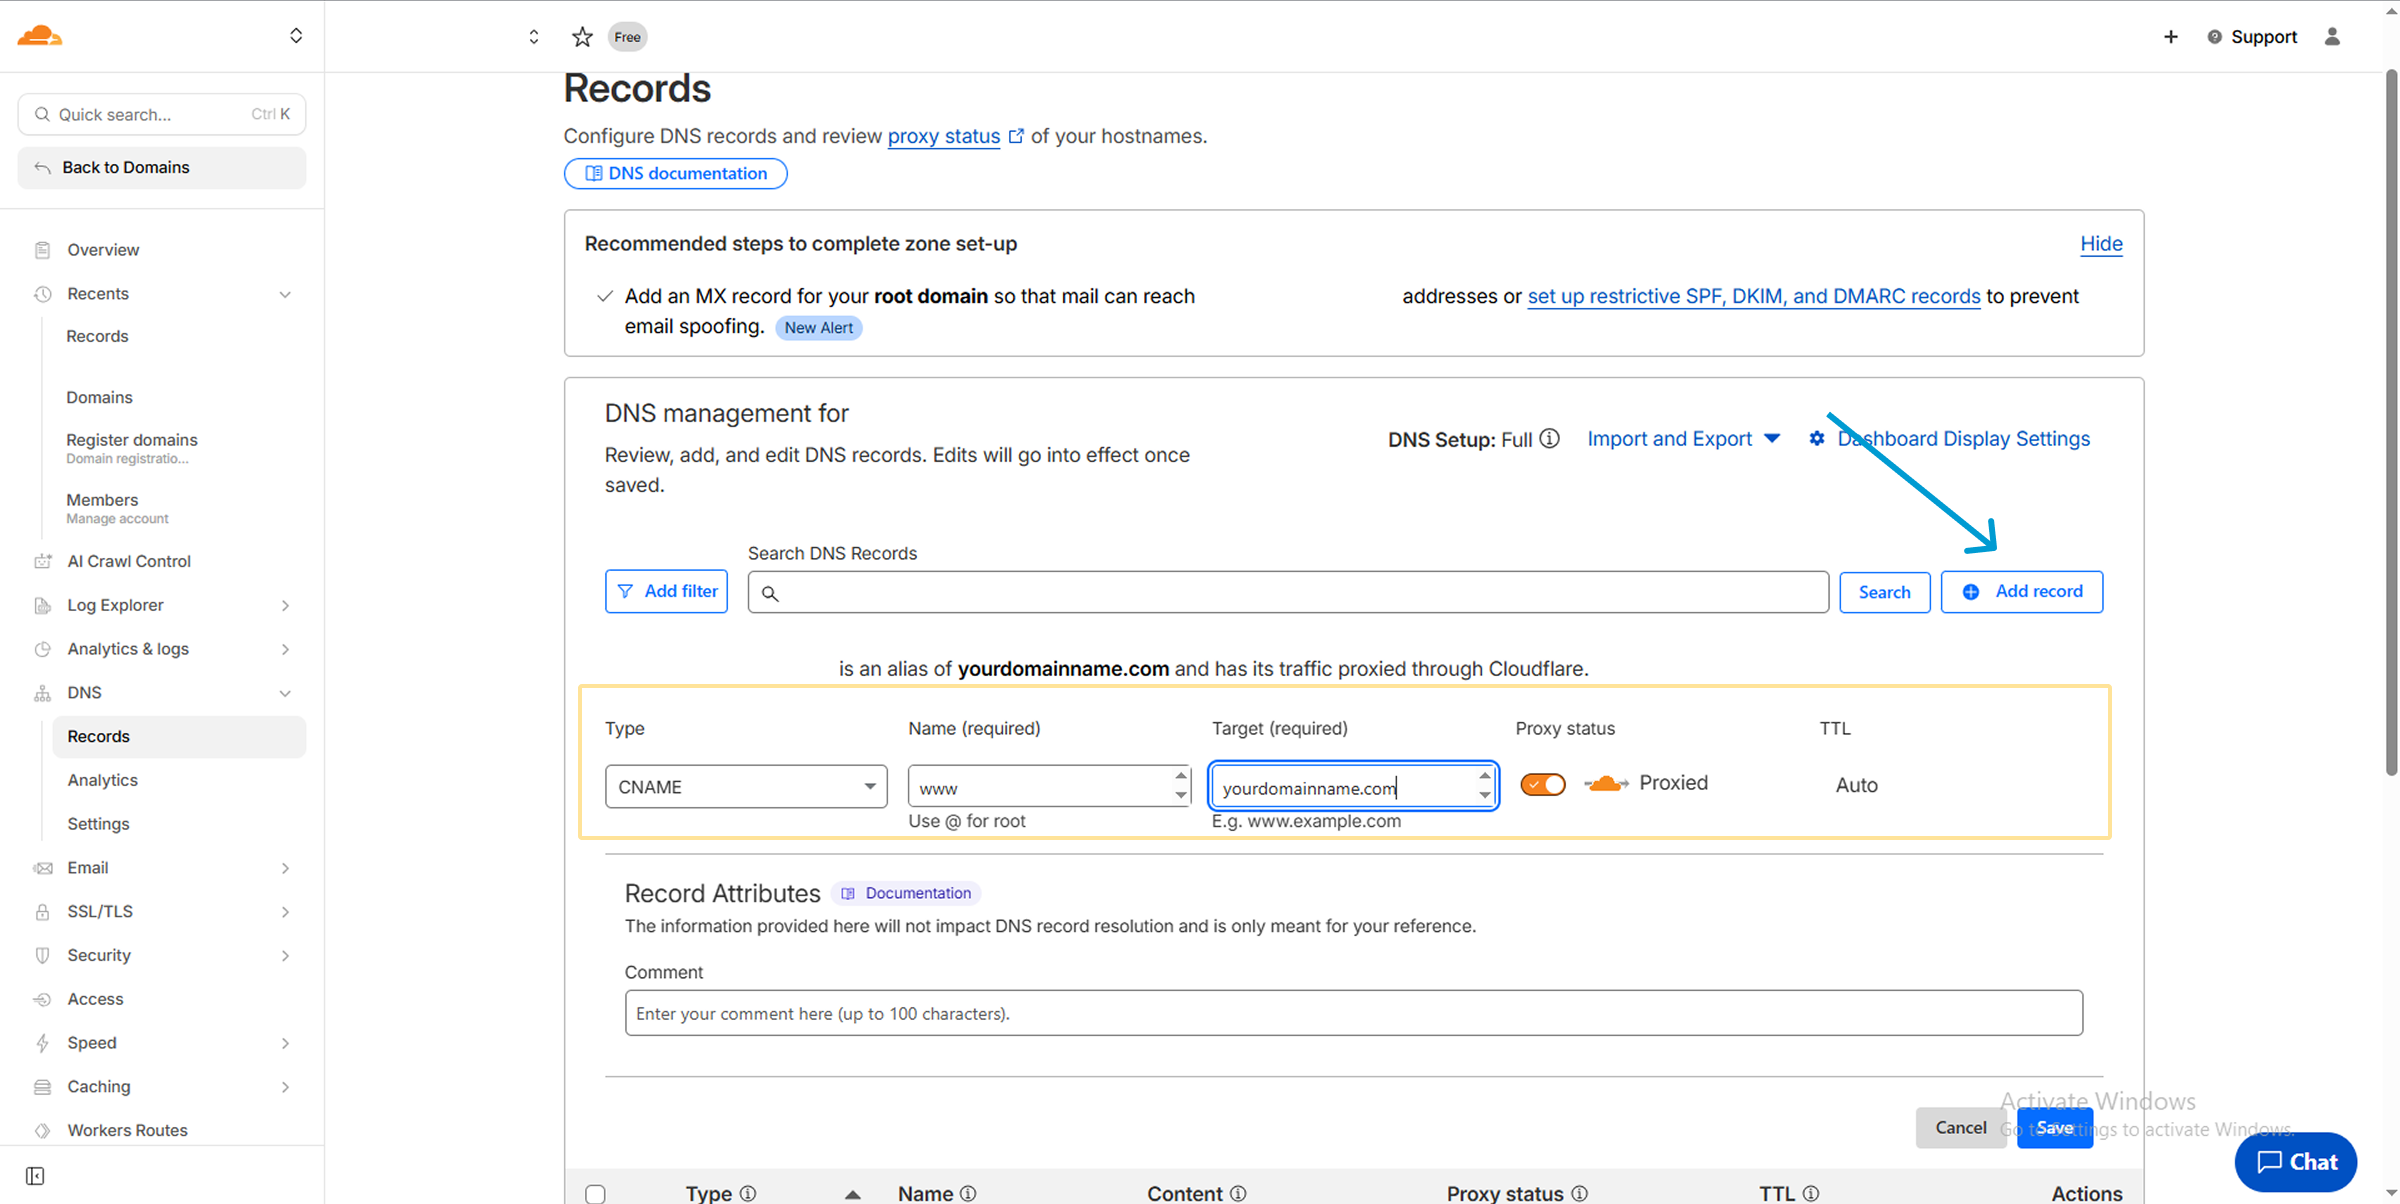
Step 10: Add CNAME Record (For ‘www’) Click “Add Record” again.
Why use A Record instead of Nameservers?
Why we did not change Nameservers:
Speed: Nameserver changes take 24-48 hours to work. A Records update instantly (2-5 minutes).
Security: By keeping Cloudflare nameservers, you get free DDoS Protection (Hack protection).
Free SSL: Cloudflare provides a Lifetime Free SSL certificate that is faster than basic SSLs.